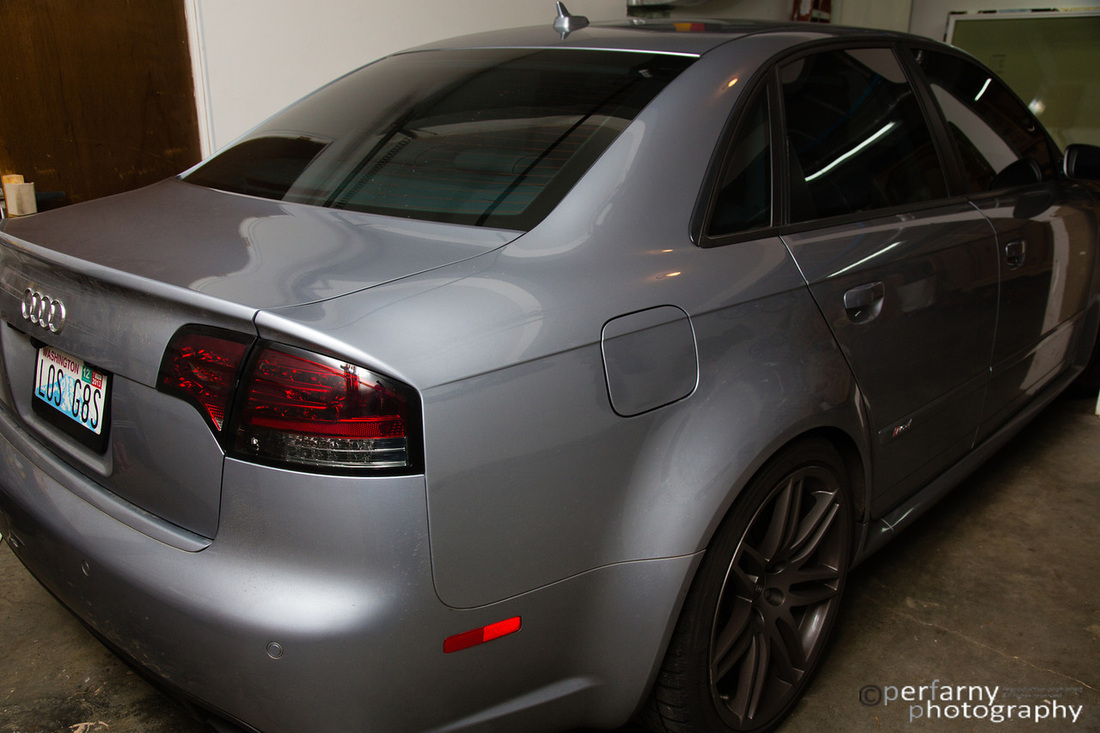
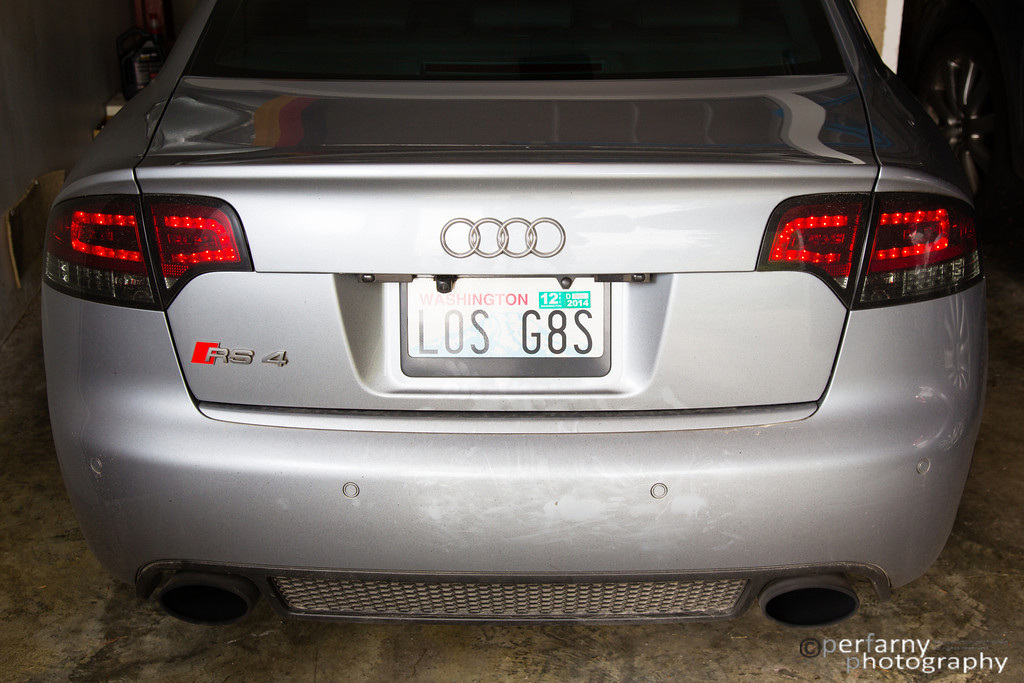
LED Tail Lights // 01.01.2013
Based on seeing a post by Reggie on QW, I got interested in the LED tail lights. Seemed like a nice way to update the look of the RS without it looking cheesy. So, I ordered from rwerks, and received the lights a couple of weeks later. They're not the greatest on communications, but shipped it promptly (holidays were in the middle) and it looks to be a good product. Install should take you all of 20 minutes. Thanks for the help from sTTay down and this thread also on some of the details.
First things first, removing the old tail lights. They're all held in via just one screw/nut. You access these from within the trunk. Pry out the covers gently with a flathead. They're attached at the bottom, so do it on the top.
First things first, removing the old tail lights. They're all held in via just one screw/nut. You access these from within the trunk. Pry out the covers gently with a flathead. They're attached at the bottom, so do it on the top.

|
|
Insert a flathead screwdriver into the middle of the black part and unscrew (it has a slit in the middle which is hard to see at first glance). Here it is removed with a better view:
|
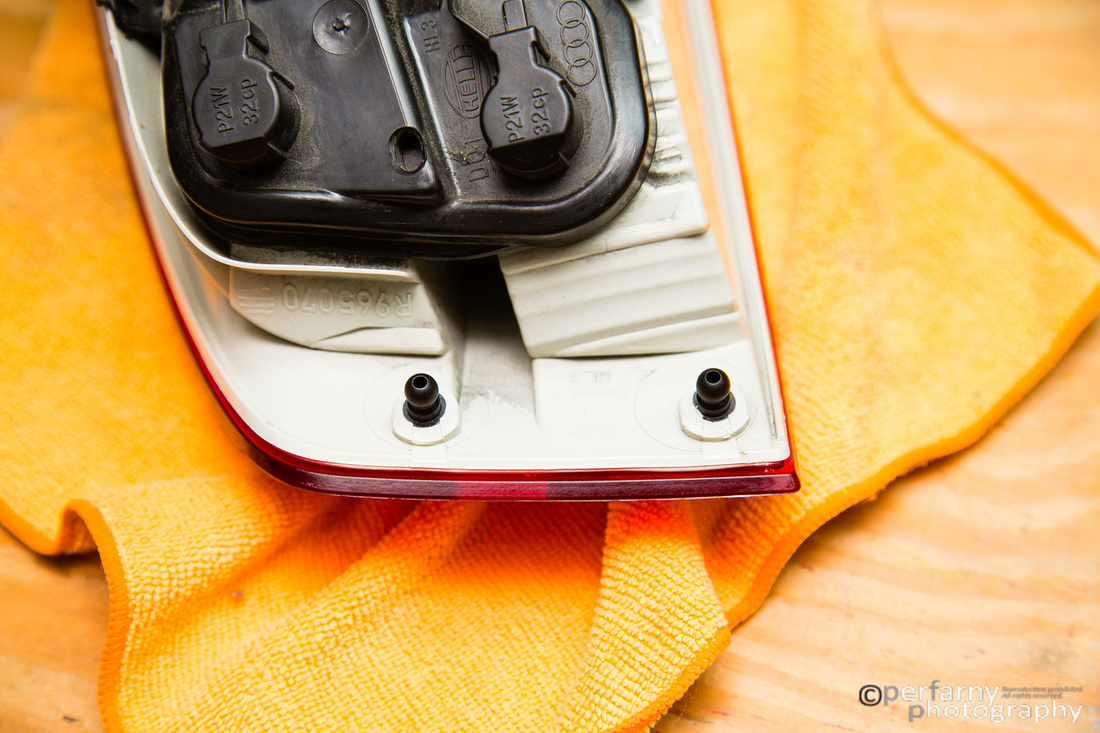
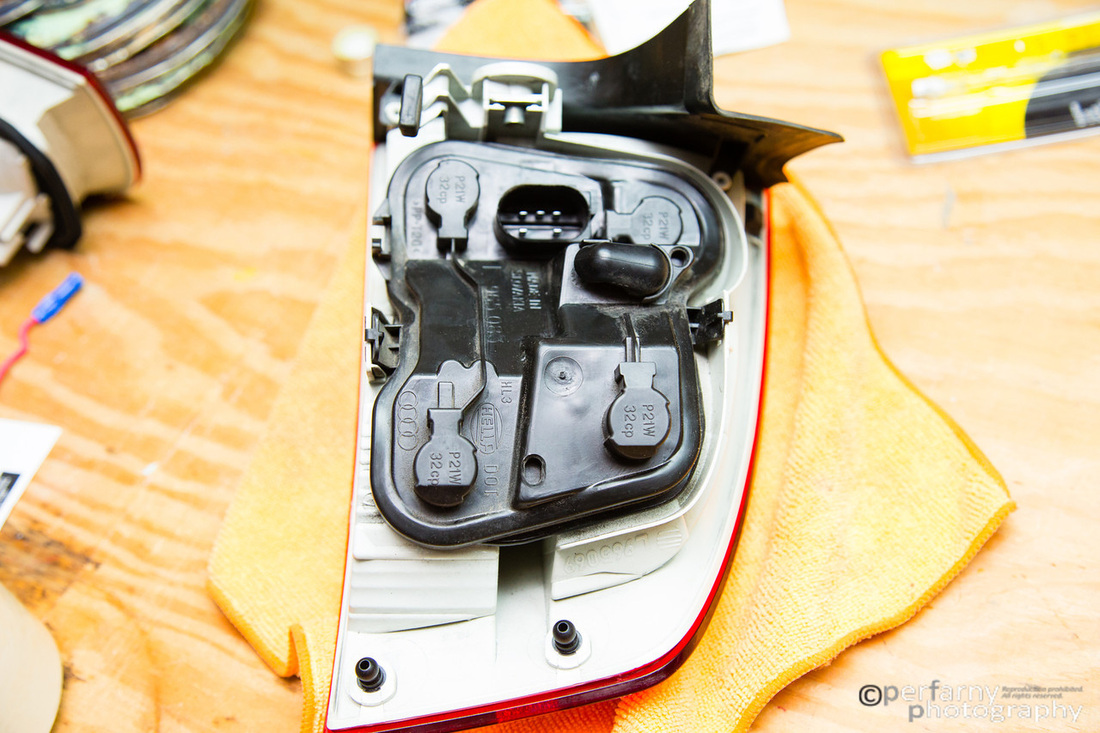
Now, gently remove the large tail light piece. Do this by wiggling the light in/out and left/right GENTLY. There are two tabs that connect to the body on the outside of the light, these are the ones you don't want to break off. Disconnect the one wiring connector (no tabs to worry about here, just pull), and remove. Now, take the reverse bulbs out of this housing by depressing two tabs on the back of the OEM light and twist and remove the backup-light bulb. Now, install the LED tail light. Connect the wiring: make sure you push HARD to get the connectors fully seated. I initially installed (as have others) thinking they were all the way together, and got zero illumination when I turned them on. There's a tiny mismatch regarding the two connectors making it hard to get them together. Best advice is: angle in the connector piece from the light, depressing its side a bit until you have all sides inside of the connector on the car. Then press down until they're fully seated. Line up the two tabs with the holes in the body, make sure the rubber seal stays on the outside of the trunk, and reinsert bolt to secure. Done! |
|
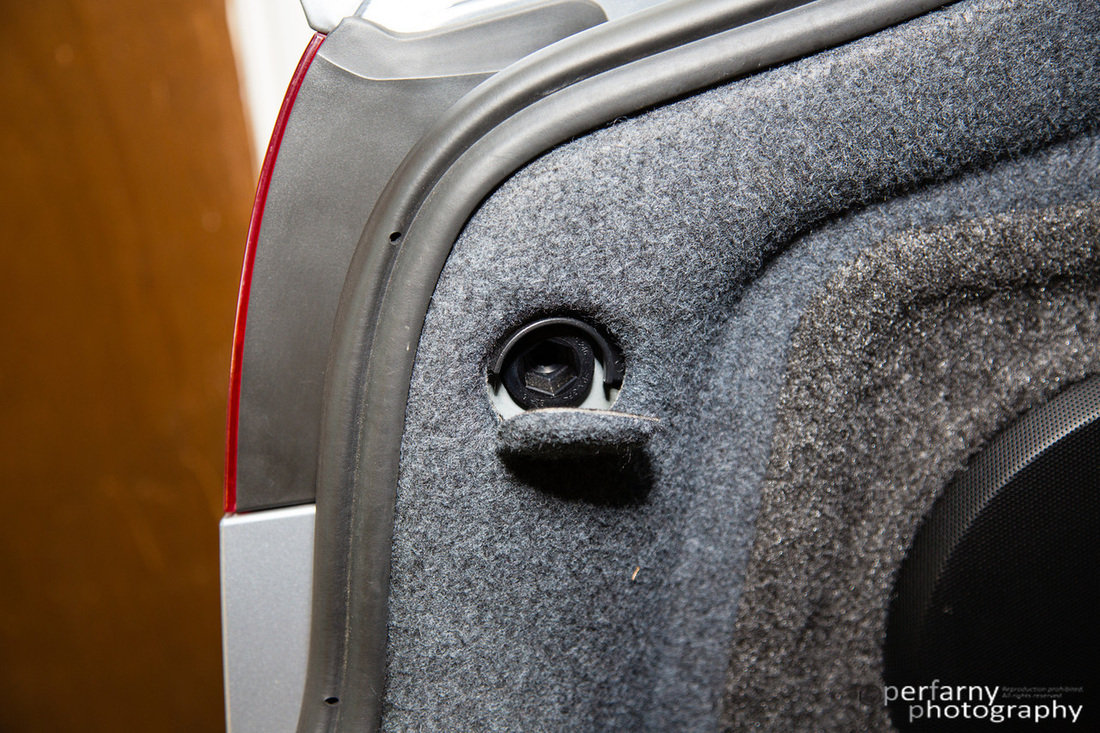
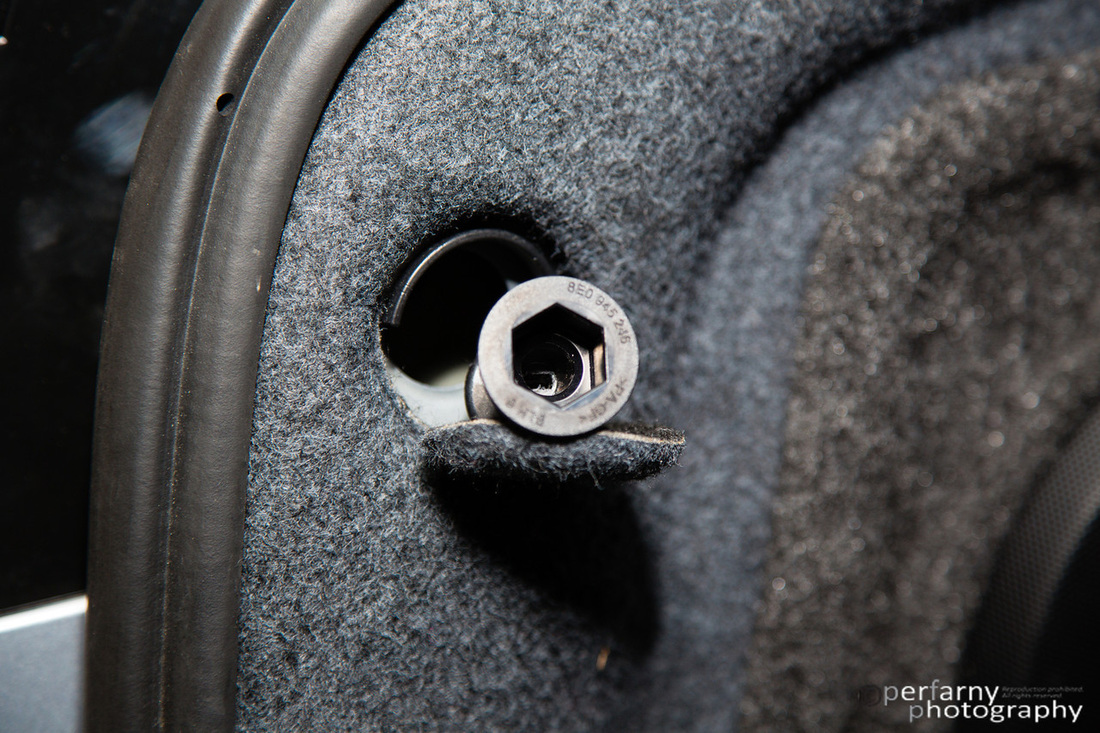
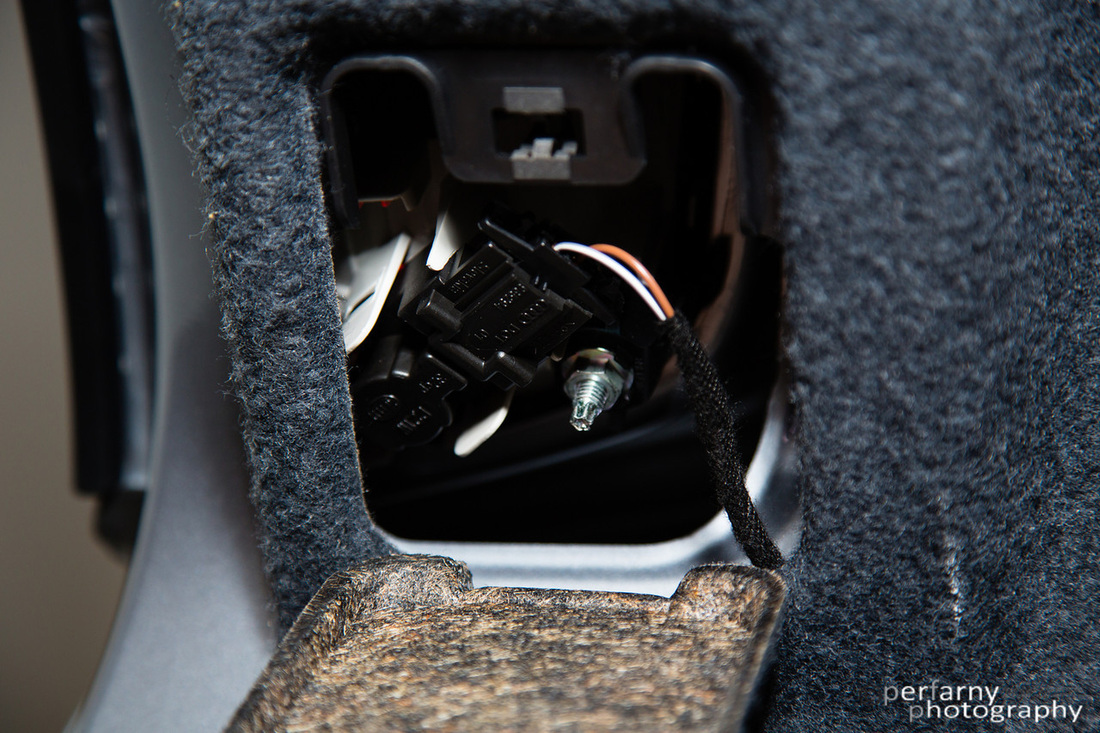
Next, the smaller trunk lid light. Open the cover concealing the light from the inside as per above (flathead) and undo the 10mm nut. Its role is squeezing a hard plastic piece against the body of the car in order to secure the light. In the pic below, to the right of the red wire you see a black plastic piece extending over the silver trunk body. As the rest of the plastic piece is anchored with the light, this is how it's all held on to the car. Unplug the harness (there are two tabs you easily squeeze together to remove) and remove the light.
Take new light, undo the 10mm nut far enough so that when you seat it in the trunk lid, the plastic 'leg' can attach to the trunk lid itself. Attach wiring harness, seat the light, tighten 10mm nut. Don't overtighten as there's potential for that plastic 'leg' to get pushed out to the sides of the trunk lid, therby loosening the fit, and potentially breaking it off.
Repeat on the other side, and you're done.
Repeat on the other side, and you're done.

Update
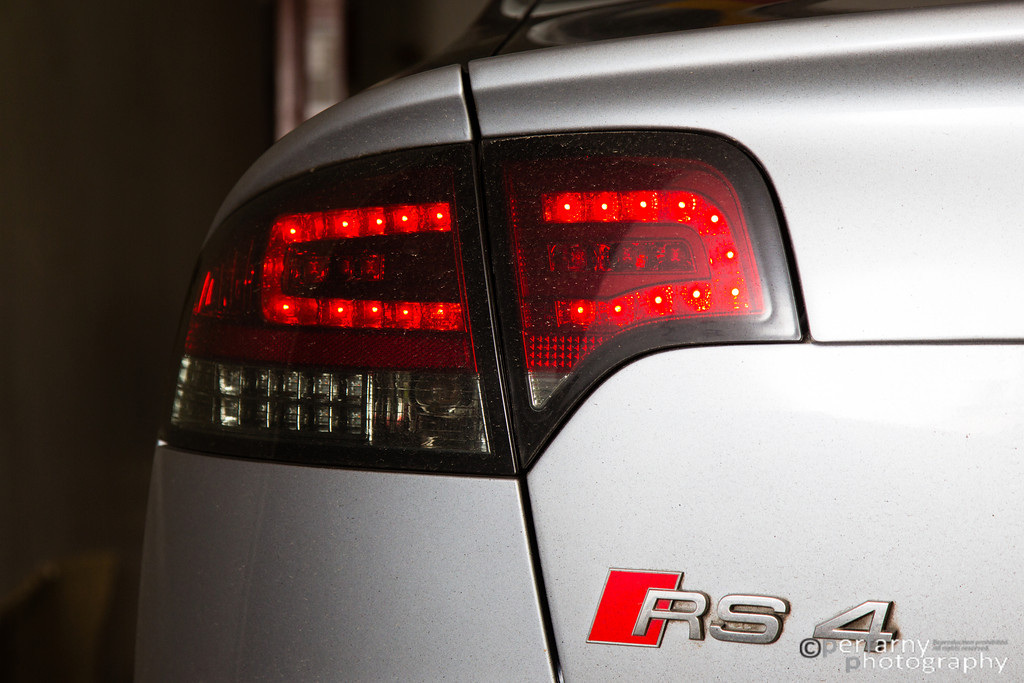
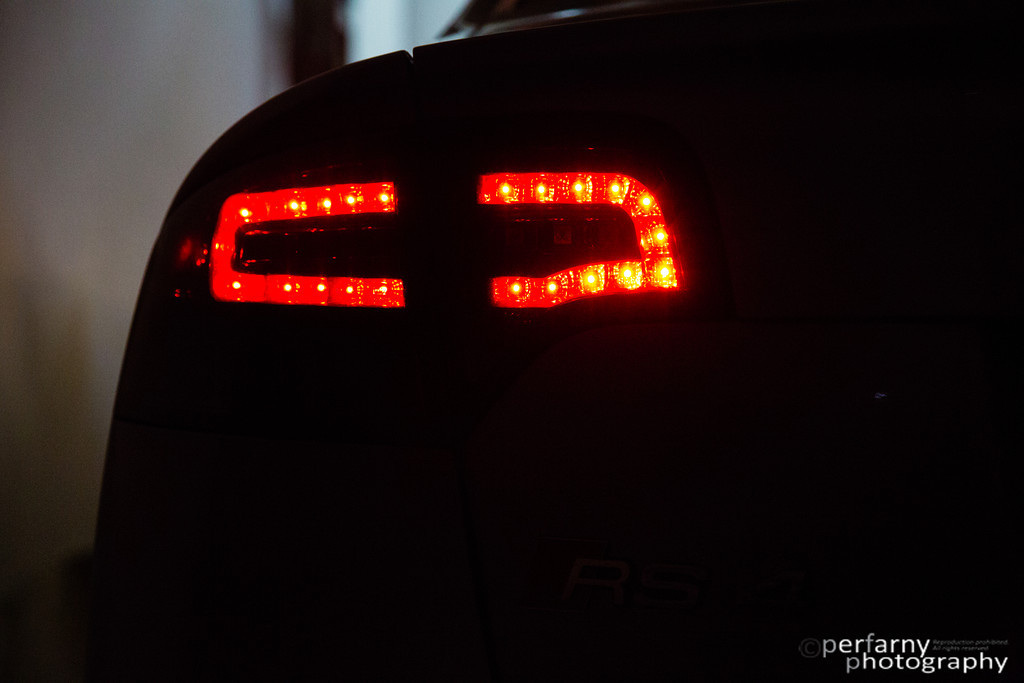
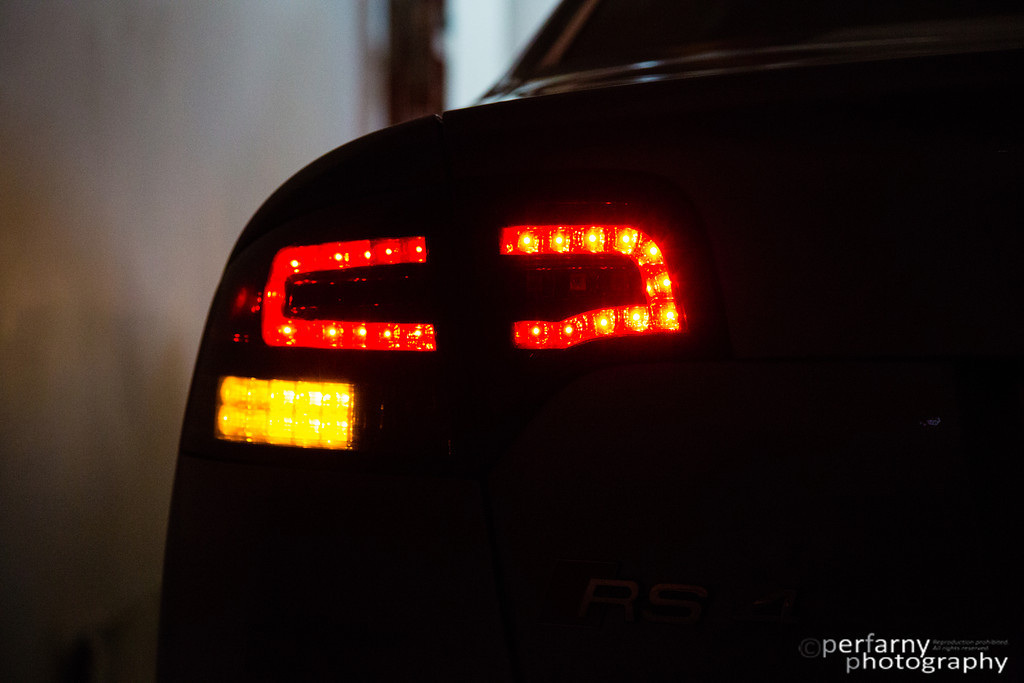
After seeing some pics posted with the smoked version of the tail lights, I asked, and received and exchange from the company. I think the smoked looks a lot better / works better for a slightly evil look for the car. Note also that the left trunk lid portion of the light doesn't fit as well as the other pieces. Funny enough, this was with both the clear and now the smoked version. I might investigate a bit more closely in the future to see if I can remedy that.
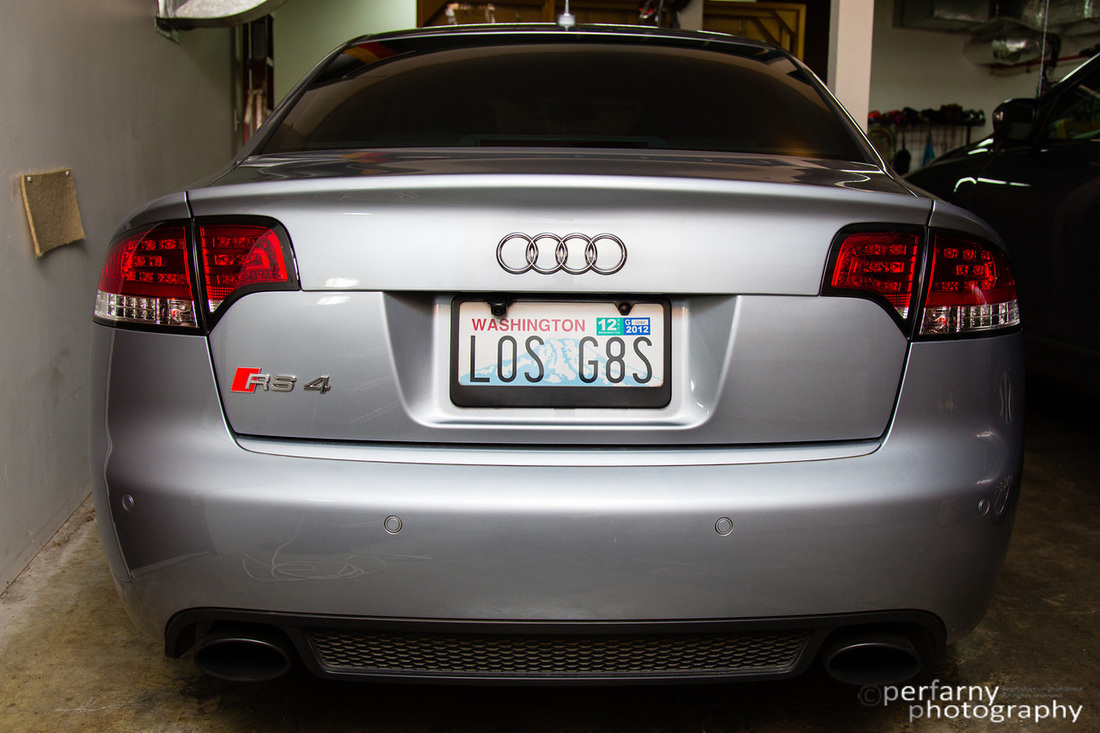
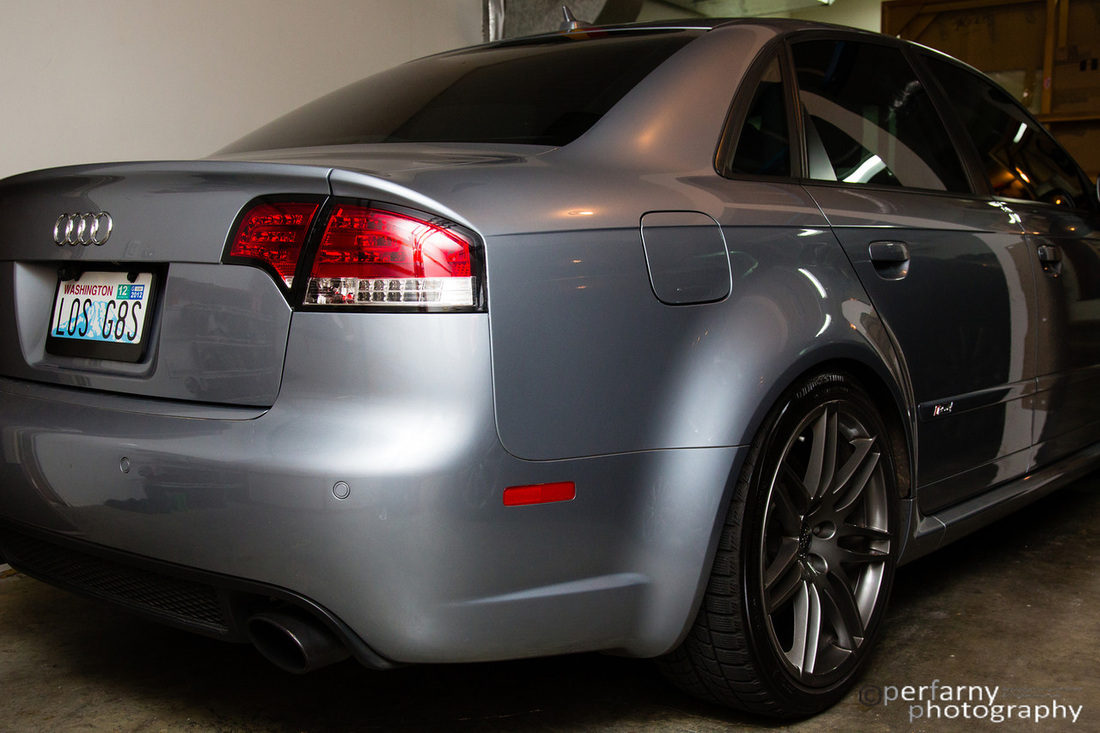
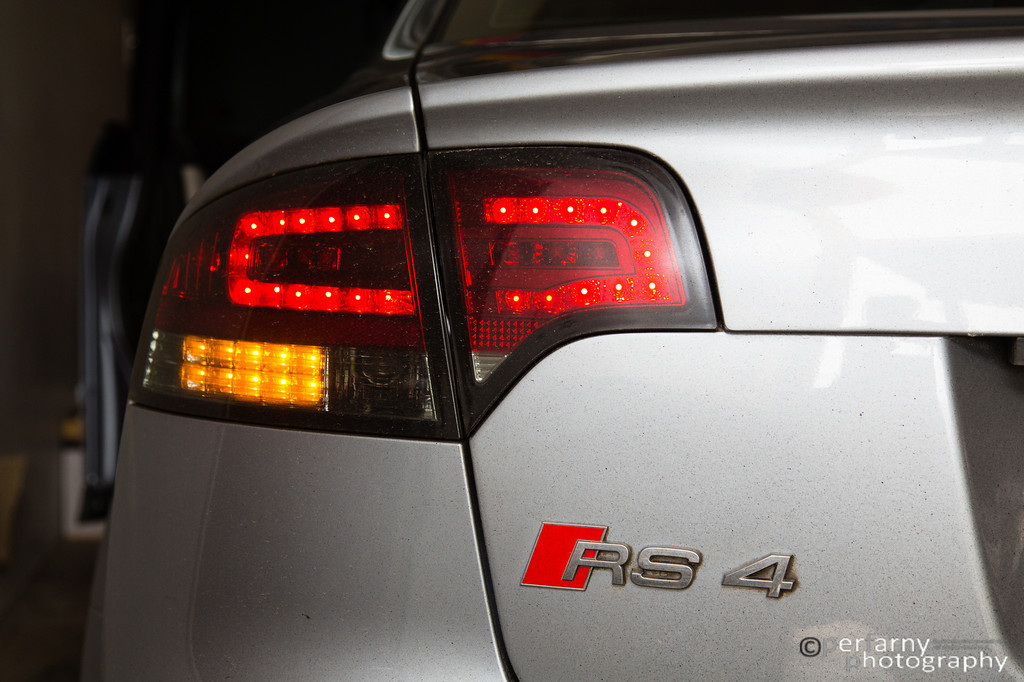
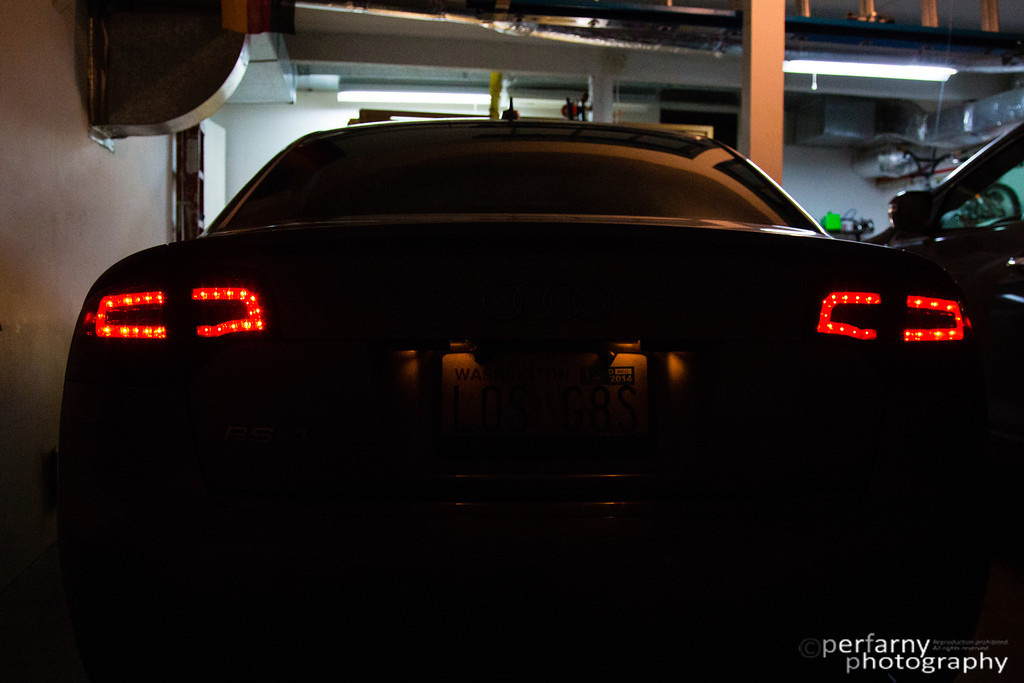
Some pics with the lights on. Dirty car warning...click pics for higher res.
Update: Resistor installed //05.17.2015
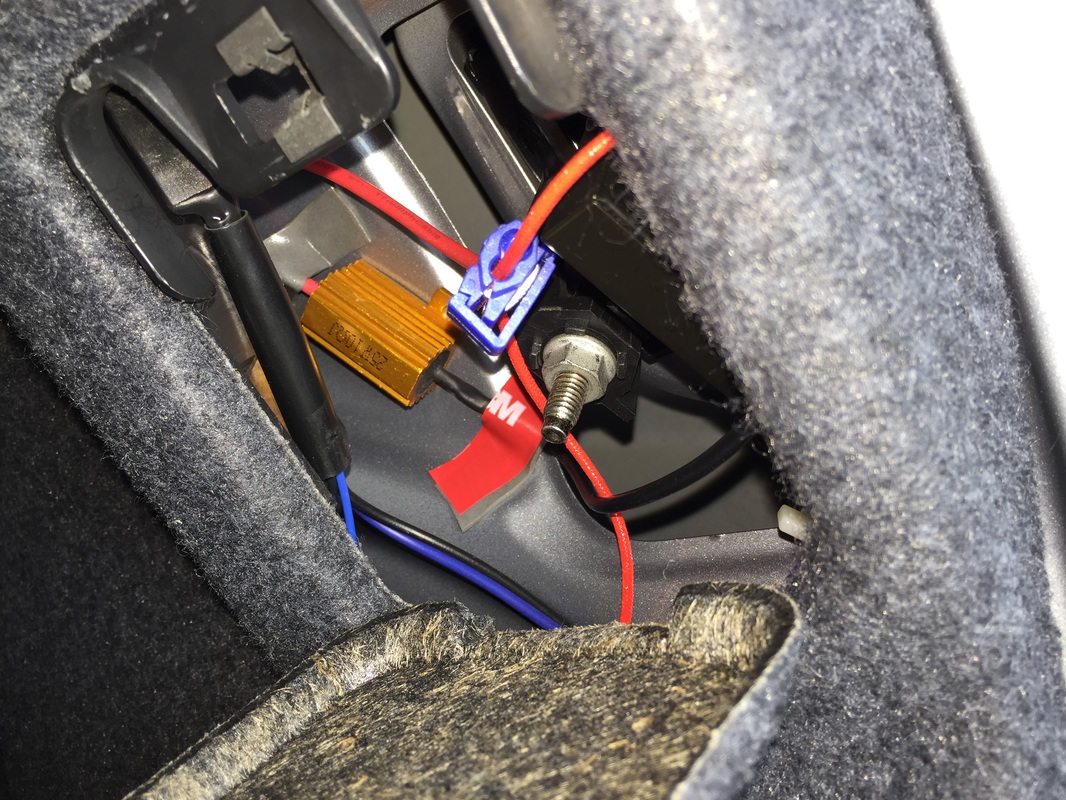
It's turned out that if I have the headlight switch set to Auto, and it's cold out, I sometimes get the 'Light Out' message on the DIS. I read that someone added resistors to get rid of this. I'm not sure where exactly to put one, though (the light on the trunk, or the bigger with turn signal piece on the quarter panel?). As a first test, I added one to the right back quarter panel light as the errors have pointed to rear right park light. Not sure this is where I needed it, but we'll see how it goes. I used exactly the same resistor as used for the DRL's, but let it hang loose in the body cavity for now where it shouldn't melt anything.
Update: Resistor install - Take 2 //05.19.2015
Well, that didn't work...Promptly at next morning's startup, the bulb out warning came on. So, this morning I installed the resistor on the trunk piece. Time will tell if it works. There were two sets of black/red wires coming off of this, too, so who knows if I picked the right ones. Trial and error fun :)